ArcGIS CityEngine Street Designer

ArcGIS CityEngine Street Designer
For years, urban designers and procedural modelers have faced challenges with the ArcGIS CityEngine Complete Streets rule—its complexity required meticulous parameter tuning, slowing down workflows. CityEngine 2025.0 Beta introduces Street Designer, a modular lane-based system that simplifies street creation, improves customisation, and enhances export flexibility for visualisation in game engines and 3D visualisation software.
Background
The design process for streets in CityEngine got a boost in 2015 with the publication of the Complete Streets rule. Developed by David Wasserman during his internship at Esri, this rule allows creation of complex street designs with the option for adding details like vehicles, pedestrians, streetlights and other street furniture, reporting options including painting, braking sight, object counts and more. While the Complete Streets rule offered extensive customisation, its sheer number of interdependent parameters made design workflows increasingly complex—requiring significant adjustments to achieve desired results. David wrote the unofficial user guide for this rule spanning 46 pages.
After departing Esri, David continued updating his version of the rule on the Esri Community site until 2020. Esri’s official version of the Complete Streets rule is included in CityEngine example ‘Example Complete Streets’ and it is continually developed and maintained.
Present Day
A decade later, Esri revisited the design and shifted towards a simpler approach. The result is Street Designer. The Street Designer is a modular approach for simpler street design. In Street Designer a street is configured as a roadbed (centreline) and a number of lanes – road lane, bus lane, pedestrian lane, trees, lamps, furniture lane. For each lane, the user can apply individual rule and therefore the design is simplified. Instead of one large rule there is a number of smaller ones, easier to understand and modify.
As part of the transition to Street Designer ESRI.lib has new rules for different types of lanes as shown in the screenshot below.
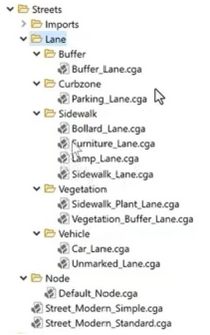
Street Designer implements a lane-based modular system. This structured approach enables transport planners to refine lane assignments and individual rules improving procedural modelling flexibility without relying on a single monolithic rule system.
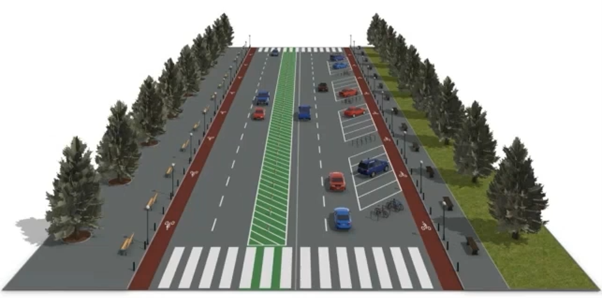
Here is an example of the street designed in Street Designer.
How to create a street using Street Designer?
The design process consists of four steps:
- Create a street using the Street Creation Tool
- Add or remove lanes from Edit Lanes window
- Assign rules individually, selecting rules from ESRI.lib for each lane enabling precise customisations
- Modify attributes for lanes based on design needs
The starting point is to use the standard Street Creation Tool and draw a street. Once the street is created, add lanes with the new Street Designer tool. This tool is easy to use, with visual cues where lane can be added. For finer control use the Edit Lanes window shown in the screenshot below.

The next step is rule assignment. The new rules created for Street Designer are included in the ESRI.lib folder in current workspace. You need to apply rules to each lane individually.
The final step is modifying the attributes for each lane. Each rule has different attributes providing fine grain design details.
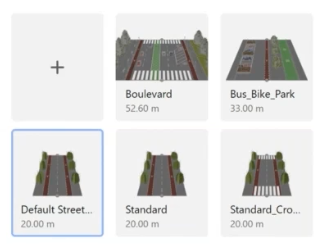
If you are working on a large area with many streets there is a lot of manual work and detailing with attributes. However, Street Designer has a feature called the Street Configuration that allows for the creation of a library of standardised street designs. These standardised street deigns can be applied to any street layout across multiple projects via the Street Configuration Manager providing visual feedback when necessary.
Exporting
With Street Designer, each lane can be exported as a separate set of objects. This modular approach simplifies asset replacement workflows, enabling users to substitute default objects with meshes optimised for game engines.
Using Complete Streets rules meant you didn’t have access to street furniture, for example, as separate objects once street models are exported from CityEngine. This meant that users would need to create all details including benches, parking metres and streetlights or create placeholders and then replace them in the game engine with blueprints or higher quality assets.
With Street Designer it is now possible to handle every lane separately and when exported they are exported as separate objects. This means that it is now a simple task to modify separate objects in applications such as in Unreal Engine with a blueprint that includes high quality mesh and light source with optional use of IES profiles. If you like the assets from CityEngine you can even use static meshes in your own blueprints for simpler workflow.
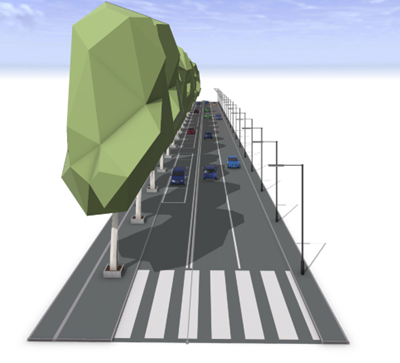
This workflow improvement reduces time working in Unreal Engine significantly. Below is a street created with Street Designer, exported as a Datasmith file and then imported into Unreal Engine where the original streetlights objects were replaced with a simple blueprint containing a light source.
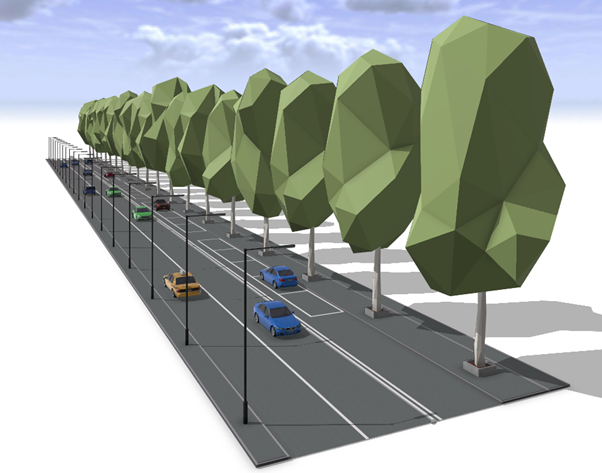
Street Design in ArcGIS CityEngine
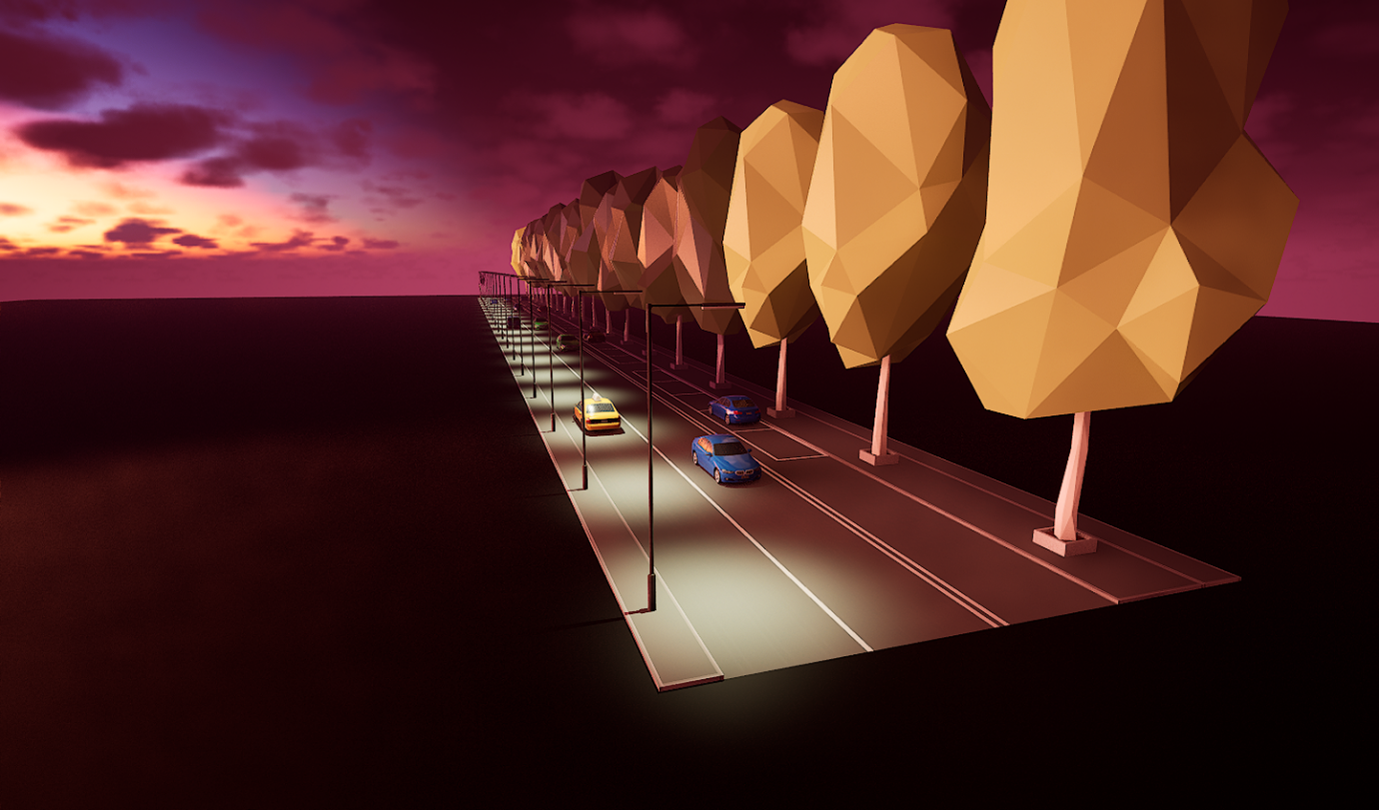
Street Rendering in Unreal Engine
For visualisation of larger areas or subdivision with numbers of streets and visualisation at night I would use Unreal Engine’s Megalights but that is a subject for another blog post.
With modular street configurations, urban designers, city planners and game developers can refine workflows for maximum efficiency.
How will you apply Street Designer in your next project?
View all blog posts