Creating and distributing Esri custom widgets (Part 3)

Creating and distributing Esri custom widgets (Part 3)
Deploying an Experience Builder widget to Enterprise.
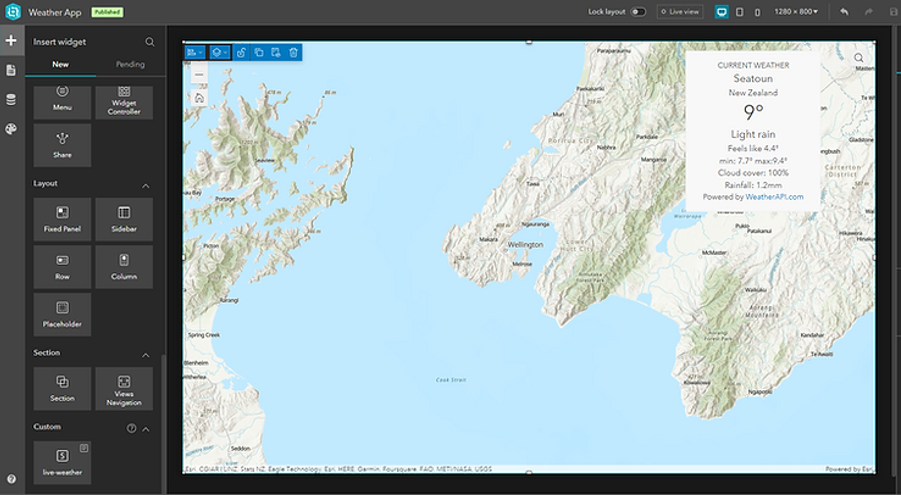
In the first post in this series, I described how to create a custom Esri JavaScript API widget and publish that widget to npm using a CI/CD approach with Azure DevOps. The second post extended this workflow, by wrapping the widget in an Experience Builder widget and application and publishing that to an application.
In this post, I will describe how we can modify the pipeline for our Experience Builder widget, to publish the widget to ArcGIS Enterprise. From here, the widget will be available within the ArcGIS Enterprise version of Experience Builder, so your users can add it in to their own applications. (Note, this workflow is only supported at ArcGIS Enterprise 11.0)
Prerequisites
To complete this you will need:
- Access to an ArcGIS Enterprise 11.x implementation.
- An Azure DevOps account.
- An Azure static web app (or you could use an App Service, or any other solution for hosting the widgets folder).
1: Adding in a deployment script
To publish our widget to ArcGIS Enterprise, we will need to publish it to ArcGIS Enterprise as an item. To create a consistent publishing experience, we will script the deployment; as we are working within Azure DevOps, there is no opportunity to use the ArcGIS APIfor Python.
However, as most of the Esri APIs are a wrapper around the REST API, if you know how to use the REST API, then you can pretty much do anything on the platform.
If you have followed along with the previous posts, then you should have a folder structure that looks like the following. For the sake of simplicity, I have created a new repository with the same folder structure, as the focus is not on publishing an app, but a collection of widgets.
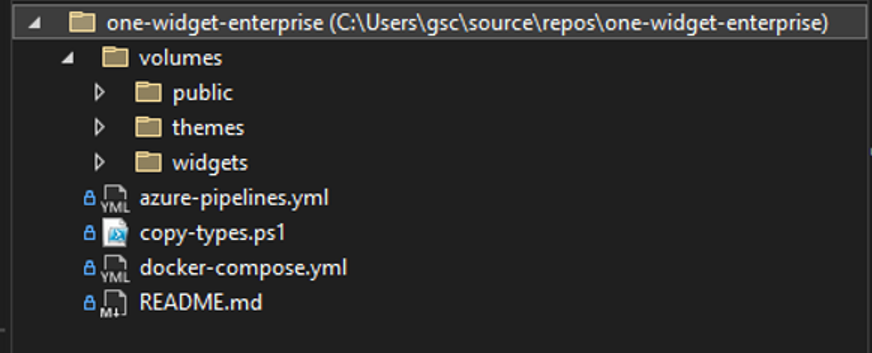
Add in a new folder called scripts.
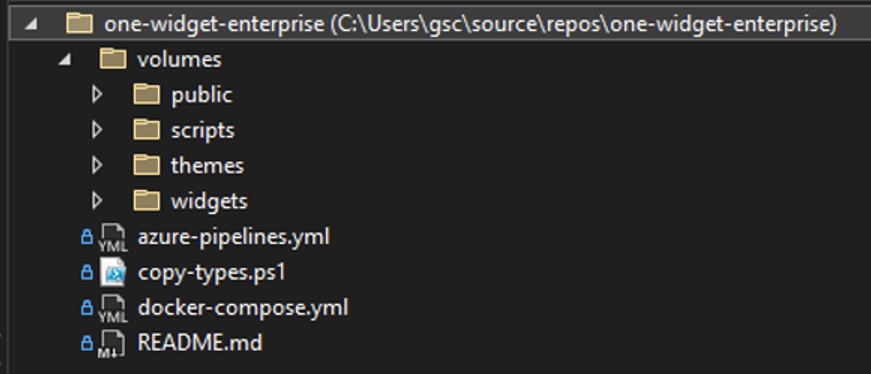
Within the scripts folder, add two new files:
config.json
deploy-to-enterprise.py
In the first file (config.json), copy the following in.
{
"portalURL": "",
"username": "",
"password": ""
}
The values for the file will be inserted as part of the pipeline, where we can pull the values from a variable library, this gives us the flexibility to deploy to different portals, eg dev/test/preprod/production environments.
The file will be read into the python file we are about to populate.
You can download the python file from here
The file is fully commented, but at a high level the script does the following:
1. The file expects two arguments,
2. A URL to the manifest file (more on this below)
3. A sharing level, this can be one of two values, either org to share to the organisation, or everyone to share it publicly.
4. The file will parse the config.json file to extract the base URL to the portal and the username and password.
5. Next it will create a token to be used in the subsequent requests.
6. We then download the mainfest.json for the widget from our input URL
7. We then use this to check if the item has already been published to Enterprise.
8. If we have not, then we create the parameters to publish the manifest to Enterprise, pulling some of the values out of the manifest.
9. We then publish the manifest to Enterprise.
10. Once published, we take the output itemId and use that to update the sharing to value we passed in as an argument
(One thing to note about this file, is that it ignores certificate errors for ArcGIS Enterprise, this is due to my testing being run against a basic setup, where I didn't apply any certs to the machine and just used the out-of-the-box self-signed certs, this should be removed for production workflows).
2: Update Build Pipeline
With the file in the folder, we can now create our build pipeline to push the script out as an artifact for use in our release pipeline.
To do this, we can modify the pipeline we used to push out our custom Experience Builder application.
Essentially, what we do is the same process of loading in Experience Builder, but instead of triggering a build of the application, we just build the widgets, then extract them from the client/dist-prod folder.
The full yaml is presented below.
variables:
- name: ExbVersion
value: 1.8
pool:
vmImage: ubuntu-latest
steps:
- task: CmdLine@2
displayName: Download Experience Builder
env:
ARCGIS_LIB_DOWNLOADER_USERNAME: <YOUR USERNAME>
ARCGIS_LIB_DOWNLOADER_PASSWORD: $(AGOLPassword)
inputs:
script: |
npx arcgis-lib-downloader -p arcgis-experience-builder -v $(ExbVersion)
- task: CmdLine@2
displayName: Unzip Experience Builder
inputs:
script: |
unzip -q arcgis-experience-builder-$(ExbVersion).zip -d arcgis-experience-builder-$(ExbVersion)
- task: CmdLine@2
displayName: Copy widgets
inputs:
script: |
dir
cp -r volumes/widgets/* arcgis-experience-builder-$(ExbVersion)/ArcGISExperienceBuilder/client/your-extensions/widgets
- task: CmdLine@2
displayName: Create App Directory
inputs:
workingDirectory: arcgis-experience-builder-$(ExbVersion)/ArcGISExperienceBuilder/server
script: |
mkdir public && cd public && mkdir apps && cd apps
- task: CmdLine@2
displayName: NPM install client folder
inputs:
workingDirectory: arcgis-experience-builder-$(ExbVersion)/ArcGISExperienceBuilder/client
script: |
npm ci
- task: CmdLine@2
displayName: NPM install dependancies for custom widget
inputs:
workingDirectory: arcgis-experience-builder-$(ExbVersion)/ArcGISExperienceBuilder/client/your-extensions/widgets/live-weather
script: |
npm install
- task: CmdLine@2
displayName: Update NPM custom widget
inputs:
workingDirectory: arcgis-experience-builder-$(ExbVersion)/ArcGISExperienceBuilder/client/your-extensions/widgets/live-weather
script: |
npm update @eaglegis/weather-widget
- task: CmdLine@2
displayName: NPM install server folder
inputs:
workingDirectory: arcgis-experience-builder-$(ExbVersion)/ArcGISExperienceBuilder/server
script: |
npm ci
- task: CmdLine@2
displayName: Build widgets
inputs:
workingDirectory: arcgis-experience-builder-$(ExbVersion)/ArcGISExperienceBuilder/client
script: |
npm run build:prod
- task: CopyFiles@2
inputs:
SourceFolder: 'arcgis-experience-builder-$(ExbVersion)/ArcGISExperienceBuilder/client/dist-prod/widgets'
Contents: |
**
!**/arcgis/**
!**/common/**
!**/layout/**
!**/survey123/**
!**/ba-infographic/**
!**/chunks/**
TargetFolder: '$(Build.ArtifactStagingDirectory)/$(Build.BuildId)'
CleanTargetFolder: true
OverWrite: true
- task: PublishBuildArtifacts@1
inputs:
PathtoPublish: '$(Build.ArtifactStagingDirectory)/$(Build.BuildId)'
ArtifactName: 'exb-app-widgets'
publishLocation: 'Container'
- task: CopyFiles@2
inputs:
SourceFolder: 'volumes/scripts'
Contents: '**'
TargetFolder: '$(Build.ArtifactStagingDirectory)/Scripts'
CleanTargetFolder: true
OverWrite: true
- task: PublishBuildArtifacts@1
inputs:
PathtoPublish: '$(Build.ArtifactStagingDirectory)/Scripts'
ArtifactName: 'exb-app-deploy-scripts'
publishLocation: 'Container'
The below simply copies any custom widgets out of the widgets folder, note we ignore any of the Esri OOTB widgets.
- task: CopyFiles@2
inputs:
SourceFolder: 'arcgis-experience-builder-$(ExbVersion)/ArcGISExperienceBuilder/client/dist/widgets'
Contents: |
**
!**/arcgis/**
!**/common/**
!**/layout/**
!**/survey123/**
!**/ba-infographic/**
!**/chunks/**
TargetFolder: '$(Build.ArtifactStagingDirectory)/$(Build.BuildId)'
CleanTargetFolder: true
OverWrite: true
The next task copies the files as an artifact where it can be consumed by our release pipeline.
- task: PublishBuildArtifacts@1
inputs:
PathtoPublish: '$(Build.ArtifactStagingDirectory)/$(Build.BuildId)'
ArtifactName: 'exb-app-widgets'
publishLocation: 'Container'
Finally, we also extract our python script from the folder and copy that out as an artifact to use in the release pipeline.
- task: CopyFiles@2
inputs:
SourceFolder: 'volumes/scripts'
Contents: '**'
TargetFolder: '$(Build.ArtifactStagingDirectory)/Scripts'
CleanTargetFolder: true
OverWrite: true
- task: PublishBuildArtifacts@1
inputs:
PathtoPublish: '$(Build.ArtifactStagingDirectory)/Scripts'
ArtifactName: 'exb-app-deploy-scripts'
publishLocation: 'Container'
3: Create the release pipeline
Finally, we will update our build pipeline. We need to publish our widget to a place where it can be accessed by ArcGIS Enterprise. This could be anywhere that will allow the files to be served, whether this is a folder on a web server, or in this example, an Azure Static Web Site.
One thing you will need to ensure is that you have the correct CORS policy set, this is important as it will restrict the applications that can access your widget and ensure ArcGIS Enterprise can access the correct files.
I will not go into the details of setting up a Static Web Site, there are plenty of tutorials out there for that. Just know that I have a repository set-up for my static website that is being created through a separate pipeline and published as an artifact.
Create a new release pipeline.
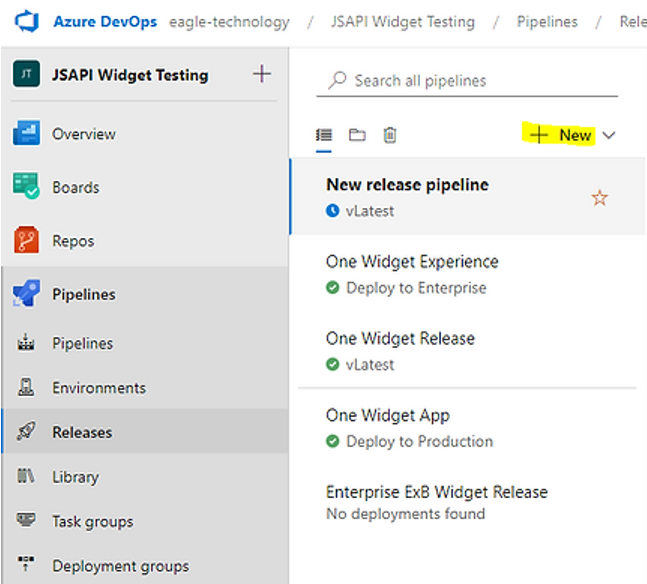
Give it a meaningful name.

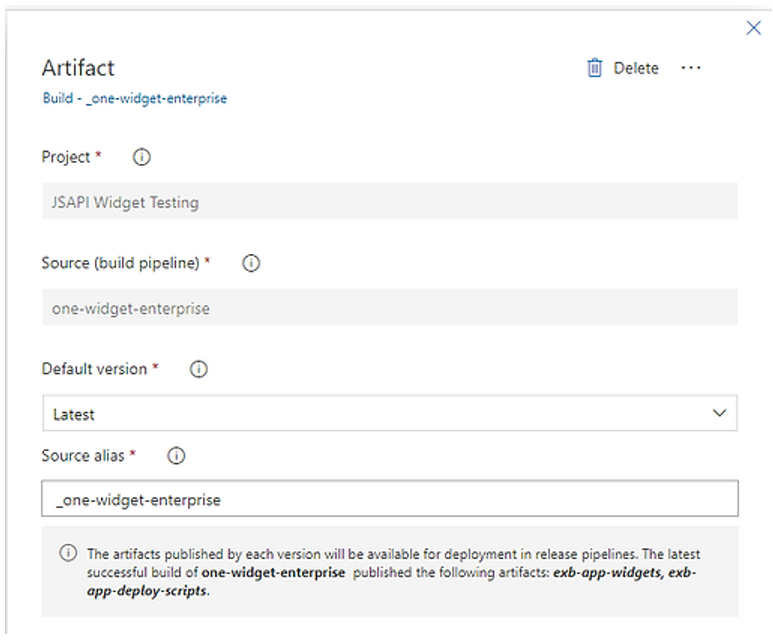
Add the two output artifacts from the build pipeline, the first is the build output from the widget repository pipeline.
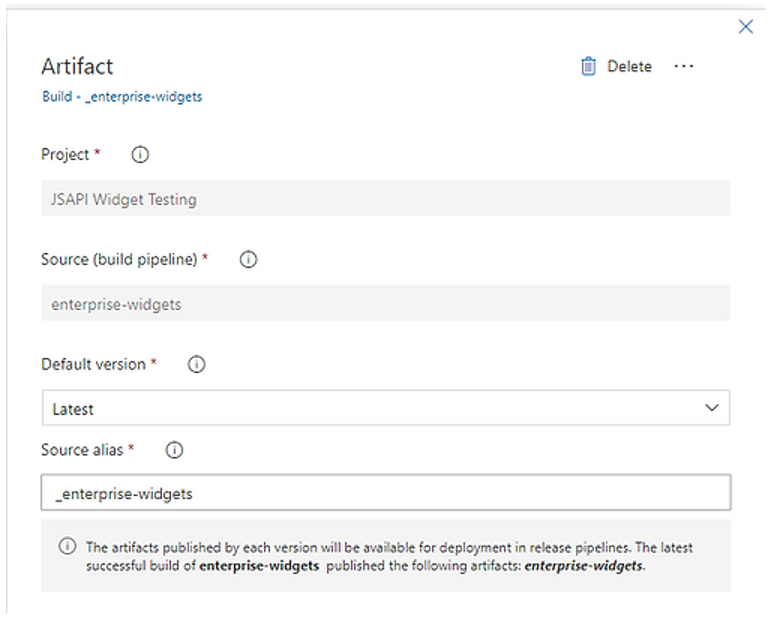
The second is the build from the static web site.
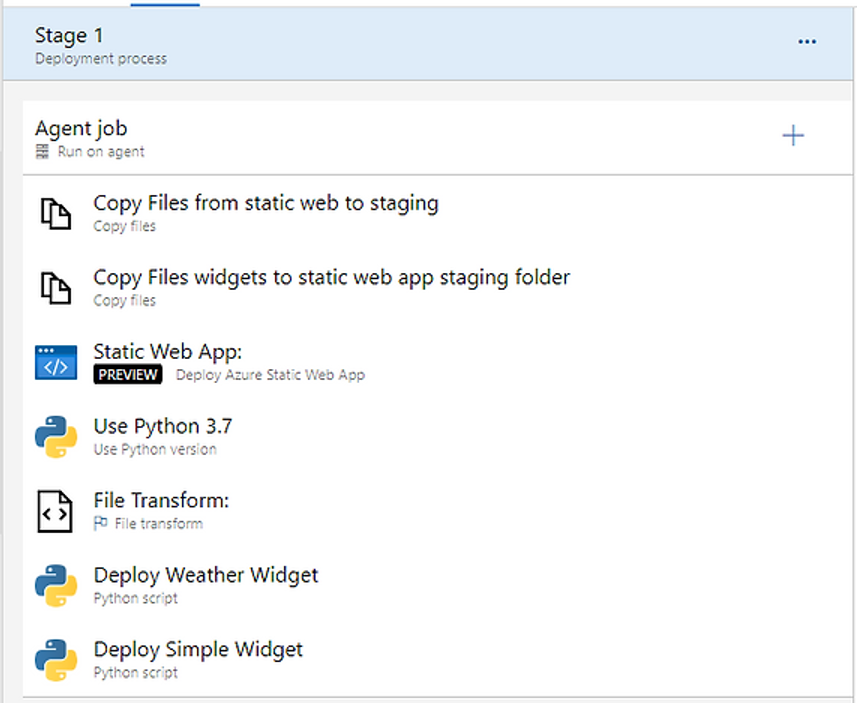
Next, add a new stage to the pipeline, and add in the following tasks
• Two Copy Files tasks,
• a Static Web App task (*if using a static web app)
• a Use Python Task,
• a File Transform Task
Finally, for each widget you have to publish, add a Python Script task.
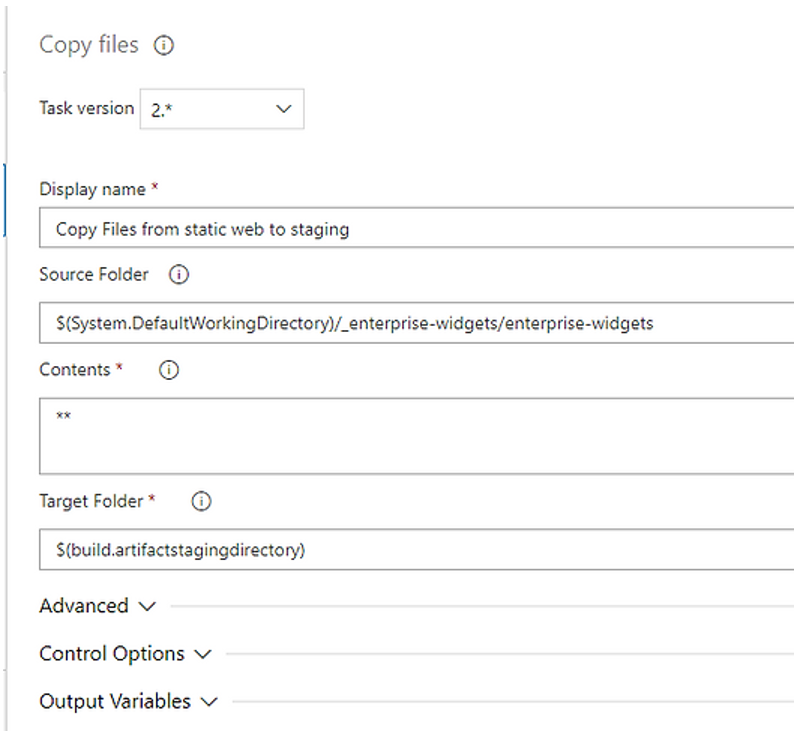
The first copy files task will copy the output for our static website into the staging directory.
The second task will copy our output widgets into a widgets folder within the staging directory.
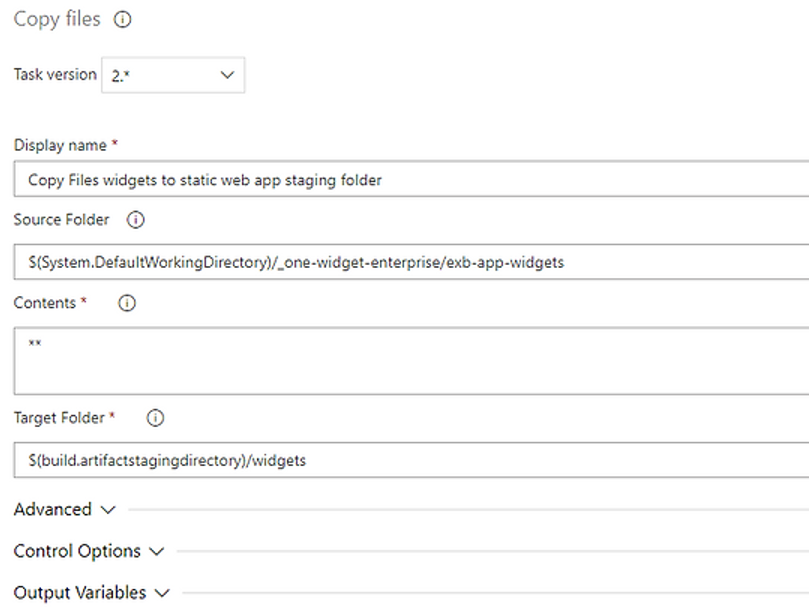
With our widgets now part of our static website, we can publish the website.
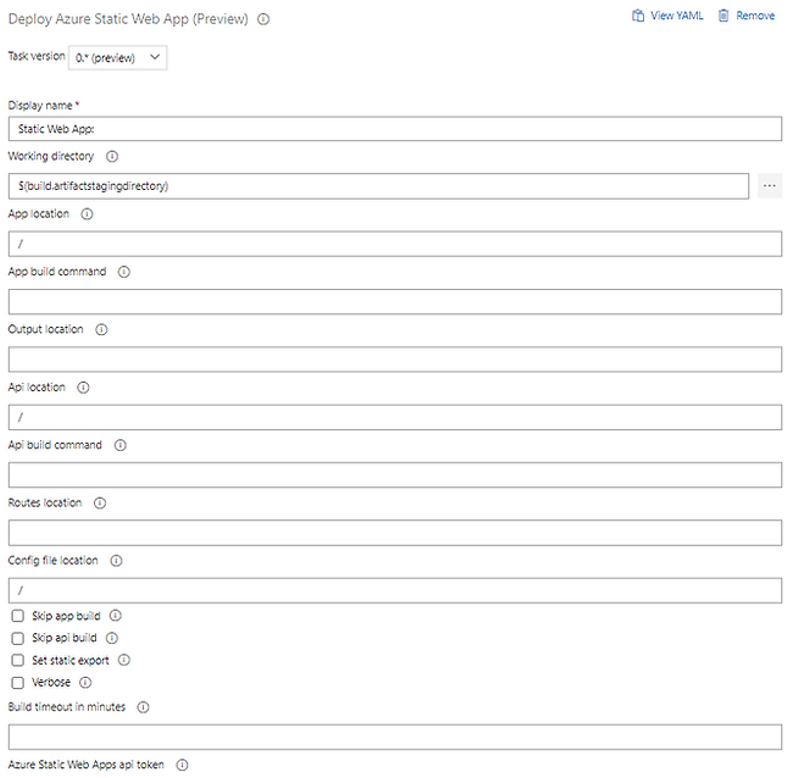
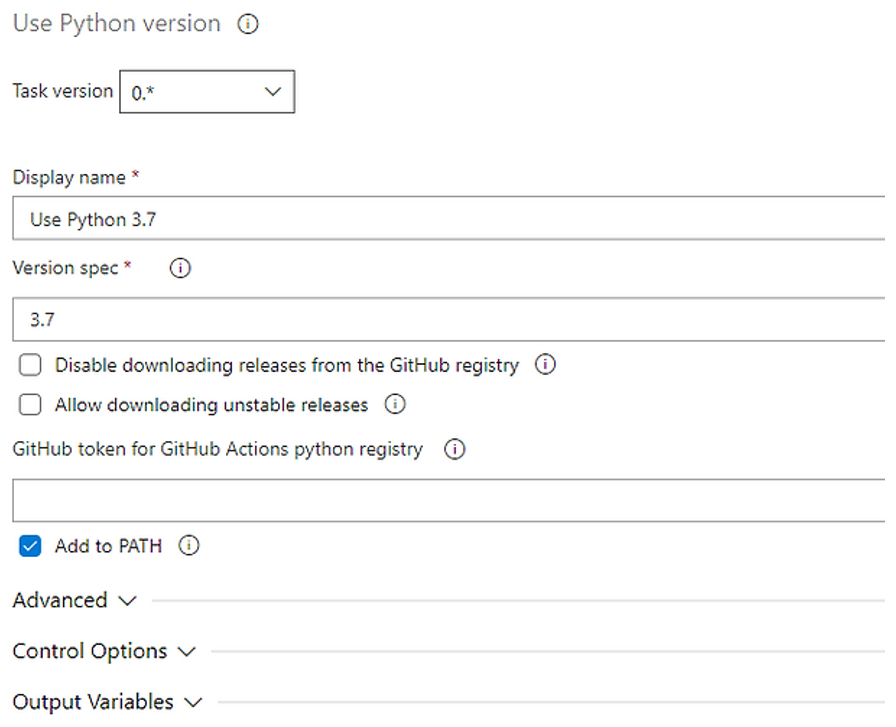
Once the website is published, we need to now publish an item to ArcGIS Enterprise, this is where we will run our script.
Set the python version.
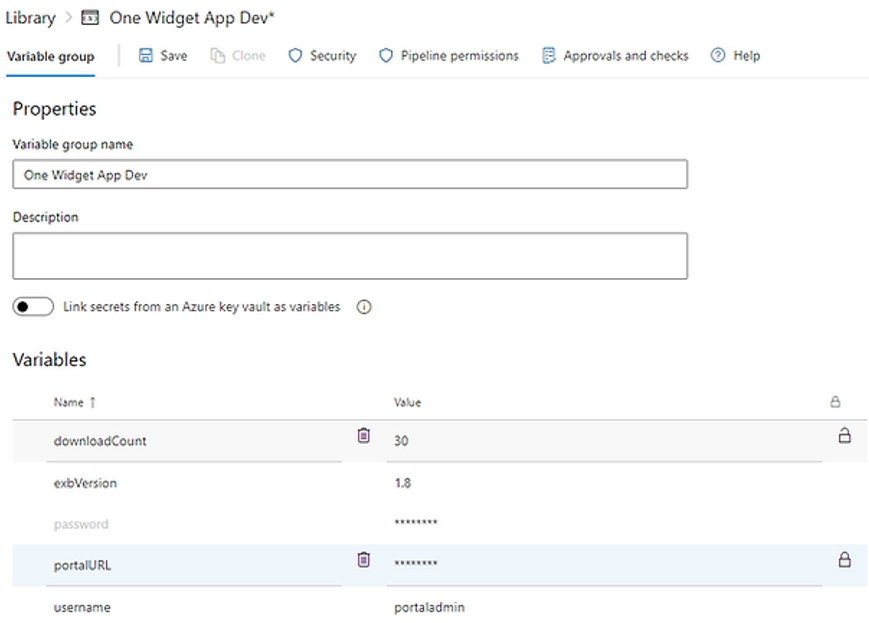
I have pushed the URL of the portal, username, and password into a variable library, which I have then linked into the pipeline. By using this approach, I could have multiple stages, pushing to different environments (dev/test/prod) and use different variable libraries for each stage.
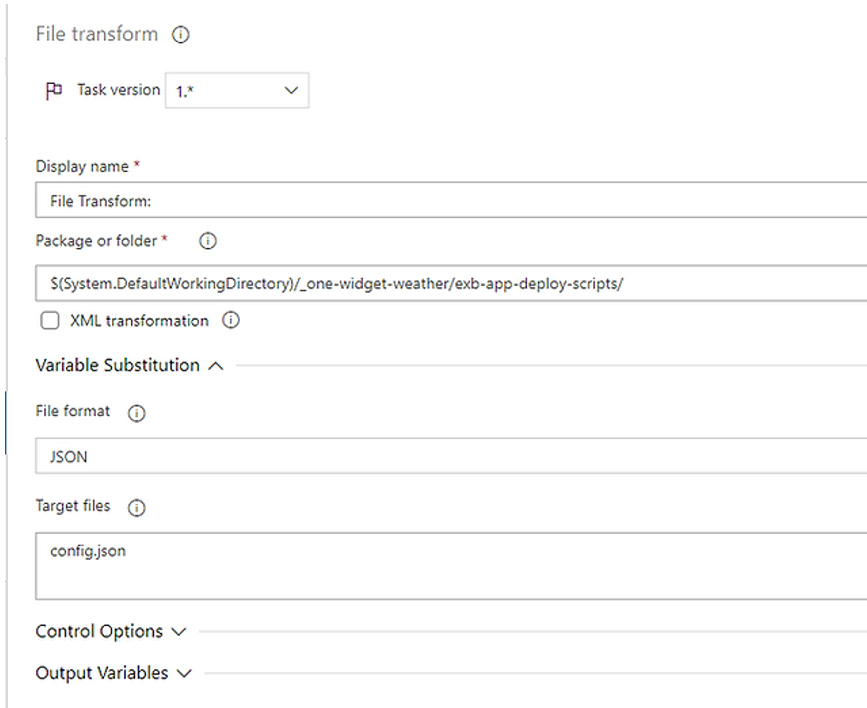
Next, we run the file transform, to push in the variables above to our config file (note, not all variables are being used).
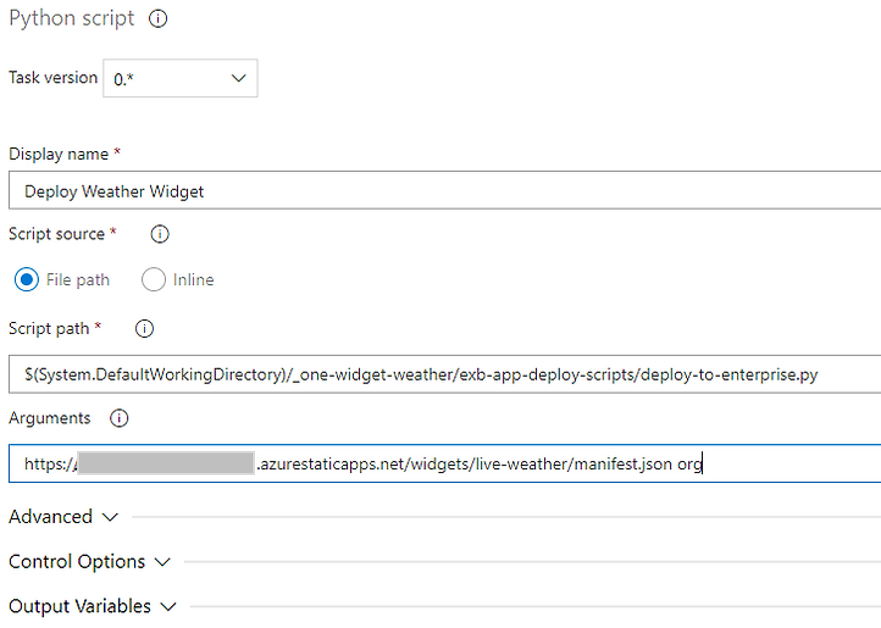
Finally, I call the script to publish an item to ArcGIS Enterprise, passing in the URL to the manifest file which is part of the static website. In this case, Azure has assigned a random name for the website, as I am using the free tier, but hopefully, you get the idea. I also pass in the sharing level for the widget, in this case, org to share the widget only with logged-in users.
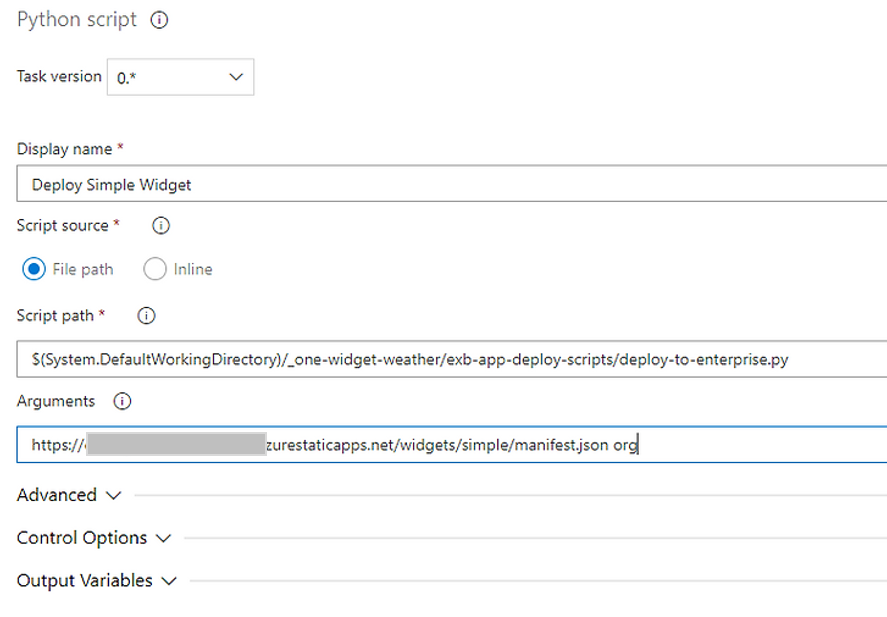
If I also want to publish more widgets from the folder, then this is just a case of adding the same task again but changing the URL.
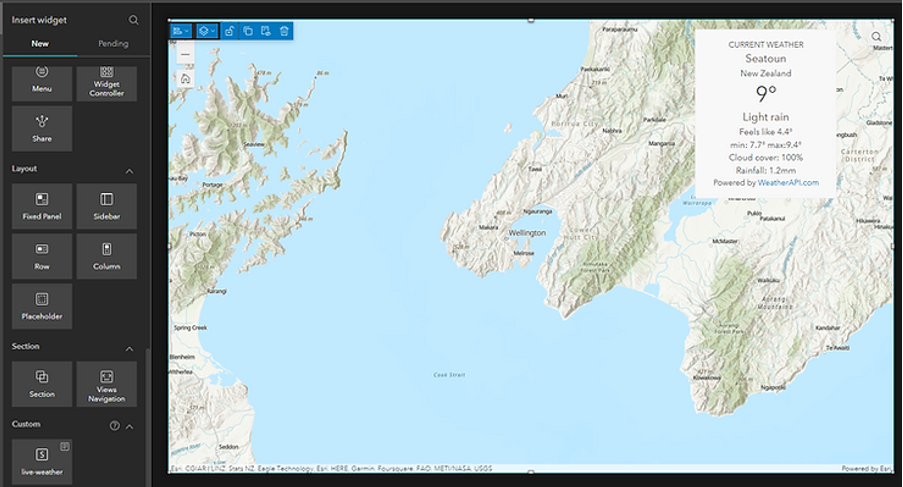
We now have a method of updating our custom widgets without having to login to web servers and copy files. The script handles ensuring that we only publish to Enterprise once, and also makes sure that we have all the correct information for the widget.
This may not be the perfect approach to creating and publishing widgets to Enterprise but is something that we have come up with as a way of being able to update and ensure that we can distribute the widget to ArcGIS Enterprise. There may be better ways of hosting the widgets, you could potentially have each widget in a separate repository depending on how you want to structure your projects and repositories.
